Gallery Representation, Ultimate Guides

Crafting a Professional Artist Portfolio for Galleries: An Ultimate Guide 

As a fine artist, creating stunning artwork is only one part of the equation for success in the art business industry.

In order to get your work noticed by galleries and potential clients, you need to craft a concise and captivating artist portfolio. Your portfolio is your chance to showcase your artistic skills and creativity, and it’s essential to make sure it’s well-crafted and visually appealing.

Welcome to the ultimate guide on crafting a professional artist portfolio that will help you stand out in the highly competitive art industry. We will cover everything you need to know, from the benefits of digital portfolios to what gallery owners are searching for.

Whether you’re an expert or a novice looking to take your career to new heights, we’ll guide you through creating a portfolio that highlights your unique talent and style.

So, let’s get started!

The Artist Portfolio and Why You Need It

Your creative vision deserves to be showcased in the best possible way. This is where the power of an artist portfolio comes in.

It’s a carefully curated collection of your best works featuring various forms of art, such as paintings, sculptures, photographs, illustrations, or digital designs. When presented in a cohesive and visually appealing manner, it becomes a powerful tool to impress potential clients, galleries, or employers and sets you apart in a highly competitive industry.

With an exceptional artist portfolio, you can showcase your unique style and artistic voice while highlighting your versatility and technical abilities.

So, if you’re ready to take your art career to the next level, it’s time to invest time and effort into creating an outstanding artist portfolio that accurately represents your talents and aspirations.

From Paper to Pixels: Why Digital Portfolios are Taking Over

Showcasing your work to galleries can be a challenge. In today’s digital age, creating a digital artist portfolio is key.

You can easily create an effective digital portfolio by using a program like PowerPoint or Apple Keynote to showcase your images, titles, sizes, and prices.

Once you’ve created your portfolio, output it as a PDF and attach it to an email, upload it to an iPad, or print it as a booklet using an online printer.

Using a digital portfolio gives you flexibility in terms of updating and sharing your work.

Even if a gallery is not accepting submissions, sending your digital portfolio can’t hurt and may lead to future opportunities. Be sure to include a separate PDF with your bio, artist statement, and resume to make it easy for gallery owners to review your work.

Digital Portfolio vs Website Portfolio

A website portfolio is a collection of an artist’s work that is displayed on their personal website, providing a comprehensive look at their body of work and artistic style to a broad online audience. It often includes a variety of artwork, artist statements, bios, and contact information.

While a digital portfolio is designed specifically for submitting to galleries with a focused selection of an artist’s best work, a website portfolio can serve as a valuable marketing tool for artists looking to reach potential buyers and collectors online.

A website portfolio can also be a great tool for reaching a broad audience, but it’s important to note that a digital portfolio should be created as a separate entity. The best format for a digital portfolio is (you guessed it!) PDF, which provides better control over the viewing experience and allows for easy sharing with galleries.

By creating a well-curated digital portfolio, artists can increase their chances of getting their work displayed in galleries and reaching a wider audience.

What Gallery Owners Want to See in Your Portfolio
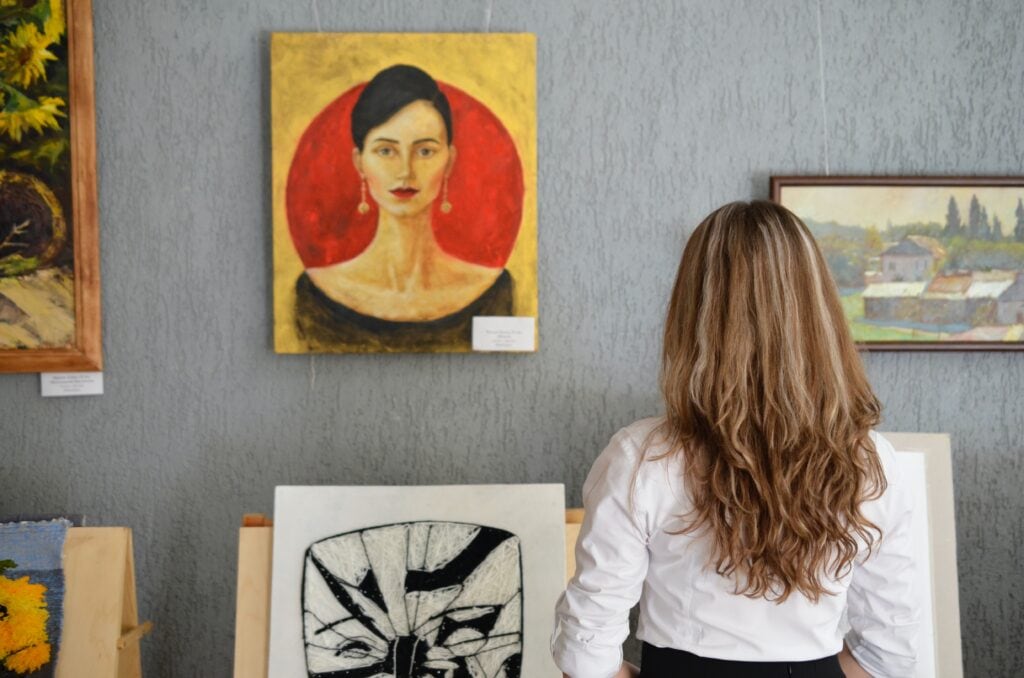
If you’ve landed on this section, you might be wondering how galleries go about selecting the artists they want to represent.

Based on Professional Artist Institute’s very own gallery representation expert, when gallery owners review an artist portfolio, they look for an emotional response to the work. If it’s interesting, engaging, and unique, they’ll start analyzing its appeal to their clientele.

Owners typically consider factors like the work’s similarity in aesthetic to other pieces, its price point, and whether it has a viable business model for showing the artist’s work.

In addition to evaluating the work, gallery owners consider if there’s a consistent body of work and if the artist can supply replacement artwork. They need to be confident they can market and build brand recognition for the artist.

While the owner evaluates an artist’s work quickly, they take some time to make decisions and consult with others before deciding to pursue representation.

Building Your Professional Artist Portfolio

Now that you have an idea of what gallery owners typically look for in an artist portfolio, you may be asking yourself, “So, how do I build a professional-looking portfolio?”

Let’s now dive into some tips to help you do just that! Follow these essential steps, and you’ll be well on your way to building an impressive artist portfolio that stands out from the crowd. <img draggable=

<img draggable= Choose a platform

You can use Google Slides, PowerPoint, or Keynote. Choose the one that you are most comfortable with, and that allows you to create a professional-looking portfolio.

<img draggable= Create a template

You may create your own template that includes sections for images of your artwork, a brief description of each piece, and your contact information. Make sure the template is easy to navigate and presents your work in a cohesive way.

<img draggable= Select your best work

Choose a selection of your artwork that represents your style and skills. Make sure the images are high-quality and showcase your work in the best possible light. You want to make a strong impression on potential galleries or clients.

<img draggable= Include your contact information

Make sure your portfolio includes your name, email address, phone number, and website or social media handles. You want potential galleries or clients to be able to easily contact you if they are interested in your work.

<img draggable= Edit and refine

Once you have created your portfolio, take the time to review and refine it. Make sure the images are properly aligned and the text is error-free. Consider having a friend or mentor review it as well.

<img draggable= Update regularly

Your portfolio should be a living document that you update regularly as you create new artwork. Keep it up-to-date and relevant to showcase your growth and progress as an artist.

A strong portfolio is key to getting your work noticed and landing gallery representation. Take your time in creating a polished and professional-looking portfolio that showcases your unique style and creative vision. <img draggable=

Should You Include Sold Works in Your Portfolio?

This might be another valid question you’re asking yourself, so here is the answer:

Including sold works in an artist portfolio is generally acceptable, but it is important to limit the percentage of sold works to 10-15%. This is to prevent overwhelming the gallery with too much work or giving the impression that there is no available work.

If some of the work is already displayed in other galleries, another 10-15%, or even 20%, can be included, but it is important to strike a balance so that the gallery doesn’t become frustrated with a limited selection.

When it comes to the pricing of sold works, it is recommended not to include prices for older pieces that would be priced higher if sold today. Instead, simply mark the piece as “sold” to avoid confusing the gallery with different price points.

Exploring the Format of Your Digital Artist Portfolio

Having a well-organized and visually appealing format is essential when creating an artist portfolio. It helps to draw the viewer’s attention to the artwork and allows for a better examination of the pieces.

A clean format with appropriate font size, image-to-text ratio, and color scheme can make a big difference in the presentation of the artwork and increase the chances of gaining representation in galleries.

Tips on Keeping Your Portfolio Clean and Simple

<img draggable= Create a format that is consistent and cohesive, which allows the artwork to be the focus.

<img draggable= Keep similar subjects together while maintaining a consistent style to create a cohesive portfolio

<img draggable= Use a tablet, phone, or printed copy of the portfolio to present it to gallery owners

<img draggable= Focus on the artwork first and foremost

<img draggable= Put the artwork before the artist statement and biography in the portfolio

<img draggable= Show framed artwork to give the gallery owner a better sense of what to expect.

Creating an Effective Digital Portfolio

Let’s dive into some expert tips that will make your artwork shine and leave a lasting impression on anyone who views it. With these simple but effective tips, your portfolio is sure to stand out:

<img draggable= Create a cover image

A well-designed cover image can set the tone for the entire portfolio and create a visual identity for you as an artist.

<img draggable= Scale up the artwork images to use as much of the white space as possible

By increasing the size of the artwork images, you can maximize the use of white space and create a more visually appealing portfolio.

<img draggable= Include a photo of yourself as the artist in the studio

This can help create a personal connection between you and the viewer and showcase your process and personality.

<img draggable= Choose the font size appropriately

Balancing the text with the visuals is important, so the font size should be small enough to fit all the necessary information but not so large that it detracts from the artwork.

<img draggable= Include your best and most representative work

Being selective and including only the best work that is relevant to the gallery or exhibition can help showcase your strengths.

<img draggable= Provide context for your work

Including titles, dimensions, and any relevant information about the materials or techniques used can help the viewer understand your vision and appreciate your work.

Landscape Vs Portrait Mode

Choosing between landscape or portrait mode for a digital portfolio comes down to optimizing the presentation of your work.

If the majority of your pieces are vertical, then portrait mode is ideal, but mixing the two is an option. The key is to keep it simple and choose the layout that best showcases your art.

<img draggable= The decision on which format to use depends on how the portfolio will be presented. For in-person presentations on an iPad or similar device, a vertical format may be more practical. For emailed portfolios, a horizontal or landscape orientation provides the most screen real estate for the viewer.

At the end of the day, it’s important to consider the presentation circumstances and choose a format that optimizes the presentation of your artwork, whether it be portrait, landscape, or a combination of the two.

Multiple Portfolios for Different Bodies of Work: Necessary or Optional?
If you have a diverse range of work, separating it into different portfolios may be necessary to appeal to different audiences.

First off, it’s important to consider the specific type of gallery you’re targeting and cater the presentation to that audience.

However, if you have a distinctive look by virtue of your medium and technique, separating portfolios may not be necessary. Instead, consider using a divider page to separate different types of work within the same portfolio.

A well-designed portfolio can showcase a range of work while maintaining a cohesive brand. So, the decision to have different portfolios for different bodies of work ultimately depends on the degree of cohesiveness – do these portfolios belong together or not?


Creating an artist portfolio is a crucial aspect of the success of any fine artist. It’s a chance to showcase your creative vision, style, and technical abilities to potential clients, galleries, and employers.

With a well-crafted and visually appealing portfolio, you can make a lasting impression and stand out in a highly competitive industry.

Whether you opt for a printed, website, or digital portfolio, make sure it’s easy to navigate and presents your work in a cohesive and professional way.

Good luck! <img draggable=

If you would like to have access to portfolio templates and your own artist portfolio reviewed by a gallery owner, consider applying to our flagship program – the Professional Artist Accelerator.

Read More
Ultimate Guides

Writing An Artist Bio: The Ultimate Guide for Fine Artists

As a visual artist, you may not consider yourself a writer, and that’s OK.

But your Artist Bio is an important piece of writing you do need to nail down.

You will need it for exhibition or gallery applications, artist websites, press releases, publicity materials, etc…

The good news is once you have it done and dusted, you won’t need to do it again!

At most, you will simply refine it over the years.

So read along, and let’s get your Bio done right…

Artist Statement and Artist Bio: What’s the difference?

The two powerful tools you can use to communicate the meaning and intentions behind your art to your audience are your artist statement and artist bio.

Your artist statement is a great way to share your creative process, inspiration, and philosophy with your audience. It’s like a manifesto for your art, where you can dive deep into what drives you to create and what you hope to achieve through your work.

On the other hand, your artist bio is like a snapshot of your artistic journey so far. It’s a potted history of your life as an artist, highlighting your achievements, experiences, and background. Your artist bio serves as an introduction to your work, and it helps your audience understand your perspective as an artist.

In other words, while your artist statement focuses on your art and medium, your artist bio is all about YOU as an artist.

When you introduce your art in your artist statement, it’s like saying, “Hey folks, check out my art!” But when it comes to your bio, you’re basically saying:

🙋‍♂️ “Hey folks, here’s a little bit about me!”

Important Considerations Before Crafting Your Artist Bio

We get it – talking about yourself can feel awkward, but the details about your passion, inspiration, and dreams are just as crucial as your artwork. People are naturally curious creatures, so it’s no surprise that viewers and readers want to know a bit about you. After all, your art is a reflection of who you are as a person and an artist.

There are a few things you might want to consider before you get started with your artist bio. Let’s go through them together!

✅ It’s OK to show a glimpse of your personality.

Starting off your artist bio with a hook is crucial to grabbing your readers’ attention.

A little bit of humor can go a long way in reeling them in and warming them up to both you and your art. So why not give it a shot and inject some personality into your bio?

✅ Your artist bio should not be too corporate—it’s not a CV or a resume.

When it comes to crafting your artist bio, it can be tempting to list out every single accomplishment and accolade you’ve received throughout your career.

But most of the time, less is often more.

Instead of overwhelming your readers with a laundry list of accomplishments, it’s important to be selective and choose only the most noteworthy and relevant highlights of your career. This will not only make your bio more concise and easier to read, but it will also give your readers a better sense of who you are as an artist.

Crafting Your Artist Bio: Tips and Tricks for Fine Artists

Okay, it’s time to roll up our sleeves and get started on writing that artist bio.

To help you out, we’ve gathered some handy tips and tricks that will make the process easier and more effective.

✅ Write in the third person (e.g., he, she, his, hers, they)

Have you ever considered what someone else might write about you if given the task of crafting your bio?

It may seem like a strange exercise, but putting yourself in someone else’s shoes and imagining what they might say about you can be an incredibly helpful tool in crafting your own bio.

This exercise can help you identify the most important aspects of your career and artistry from an outsider’s perspective, as well as highlight any strengths or unique qualities that may not have been immediately apparent to you.

So, what might someone else write about you? Perhaps they would focus on your bold use of color or your ability to create intricate and detailed works of art.

Maybe they would highlight your commitment to environmentalism and the use of sustainable materials in your artwork. Or perhaps they would focus on your professional accomplishments and exhibitions.

Regardless of what they might say, the exercise of imagining someone else’s perspective can help you gain clarity and insight into your own career and artistic identity.

Use these insights to inform your own bio and make it truly stand out to potential clients and fans.

✅ Keep it concise and straight to the point.

As a fine artist, you want your artist bio to leave a lasting impression on your readers – but you don’t want to bore them with a lengthy essay. That’s why it’s important to use simple and direct sentences that will keep your readers engaged and interested in what you have to say.

By using concise language and avoiding complex sentence structures, you can make your bio easy to read and understand. This will not only help to hold your reader’s attention, but it will also give them a better understanding of who you are as an artist and what you have to offer.

So, the next time you sit down to write your artist bio, remember to keep it simple and direct. Your readers will thank you for it. 😉

✅ Be creative.

Your creativity is your greatest asset – and that should extend to your artist bio as well. While it can be tempting to stick to a standard format or template, your bio is an opportunity to showcase your unique personality and artistic style.

So, don’t be afraid to get creative with your bio!

Your bio can be a combination of

➡️ where you came from

➡️ where you went to school

➡️ your inspirations

➡️ your artistic process and philosophy

➡️ your interests

➡️ and your accomplishments as a human being.

All of these add more dimension to your narrative. You can tackle different angles, but make sure that the subject is always your artistic development.

But let’s be real, how can you make your bio stand out and tell a compelling story?

One way is to use timelines and narrative progression to organize your thoughts and show your artistic journey in a clear and coherent manner. Break down your career highlights into different time periods, so readers can see how your work has evolved over time and how you have grown as an artist.

To get started, make sure your timelines are easy to follow. Use bullet points or subheadings to separate different phases of your career and highlight your key achievements and milestones from each era.

And don’t forget about the importance of narrative progression – by framing your career journey as a progression from past to present, you can help readers understand how each phase of your career has influenced the next.

With these tips in mind, you can create a killer artist bio that showcases your artistic development and highlights the unique qualities that make you a standout in your field.

Should Previous Non-Art Related Degrees and Jobs Be Included in an Artist Bio?

The answer is simple – yes, you may include them! Your bio is the perfect place to share your unique journey as an artist.

The trick to including non-art-related experiences in your bio is to connect them with your current artistic career. How did those experiences shape your perspective and inspire your work? For instance, if you worked in the field of child welfare, how did that experience influence your artistic vision?

Including non-art-related experiences can make you a more interesting artist and give viewers a deeper understanding of who you are as a person. It’s not just about your art degree but about the experiences that make you who you are today.

When writing your bio, don’t keep your previous jobs and degrees separate from your artistic career. Integrate them into your story and tell your audience how they have impacted your artistic process.

What’s the Perfect Length for Your Artist Bio?

If you have been wondering how long your biography should be, we’ve got you covered!

Here are some pointers to help you decide on the length of your artist bio:

✅ Your biography can be as short as a few paragraphs or as long as two to three or four pages. It really depends on how much information you want to include.

✅ If you want to keep it short and sweet, a brief summary or biographical statement at the back of your portfolio or on your website is perfectly fine. This gives a quick overview of your background and accomplishments.

✅ If you want to provide more detail, an extensive biography can be very helpful and effective in making sales. This can be from three to seven pages long, written in the third person, and laid out in a magazine-style format. This type of bio is ideal for artists who want to give collectors a more in-depth look at their life and career.

✅ Your biography is a document that can evolve over time and can grow or shrink in length. Keep it up to date with your latest achievements.

✅ Sharing your background, life, and career development can help establish additional credibility for you as an artist. Potential buyers find it fascinating, and it creates a deeper connection with them.

✅ You can combine your short bio with elements of your artist statement to weave together your work and life. This can make your bio a little lengthier, but it gives readers a more holistic view of your artistic vision and process.

There’s no one-size-fits-all answer to how long your artist bio should be. Consider your goals and the level of detail you want to share, and use that as a guide when crafting your biography.

Oops! Don’t Make These Mistakes When Writing Your Artist Bio

Did you make these mistakes when writing your artist bio? Don’t worry—it’s not too late to fix them! Let’s take a look at some of the most common pitfalls to avoid when crafting your artist bio.

✅ Poor Writing

When it comes to your artist bio, it’s crucial to make sure it’s well-written and polished. You don’t want any errors or awkward sentences to distract your audience from your amazing work.

So, take the time to proofread it multiple times and make sure it’s free of any mistakes. Even small writing errors can give off an unprofessional impression to your readers.

✅ Sharing too much information

While it can be tempting to include every detail of your life, it’s best to stick to information that is relevant to your artistic identity. Avoid sharing too much information about your personal life or unrelated accomplishments and instead focus on highlighting your artistic achievements and aspirations.

✅ Lack of personality

Let your artist bio be a reflection of your one-of-a-kind personality and style. Avoid using generic terms and concepts that make you sound like a robot. Instead, infuse your bio with your unique voice and perspective on life to make it stand out.

Ready to share your Artist Bio with the world? Here are a few things you should do first

So, you’ve written your artist bio, and you’re eager to share it with the world. But before you hit that publish button, there are a few crucial steps you should take to make sure your bio is polished and ready to impress.

✅ Read, reread, and proofread

Have you read your artist bio out loud yet? This is a crucial step in making sure that your bio sounds both natural and professional while still being approachable to your audience.

Now, chances are, your first draft is going to need a lot of trimming down. That’s why it’s important to reread it multiple times and make changes to any areas that need improvement.

And don’t forget to ask a friend to proofread it for you as well. They can give you valuable feedback on how to make it look and sound even better. Trust us, it’s always helpful to have a fresh set of eyes review your work!

✅ Have a fellow artist review your artist bio—hear that second opinion 😉

It’s always a good idea to have someone else take a look at your artist bio before sharing it with the world. And who better to turn to than a fellow artist? They can give you honest and objective feedback that can help you refine your message and make sure that your bio truly reflects your identity as an artist and your body of work.

So, if you have an artist friend who’s willing to take a look, don’t hesitate to send them a copy of your bio and ask for their thoughts. Ask them what they loved about it and what could be improved. Their insights could help clarify your message and make your bio even more effective.

How Often Should You Update Your Artist Bio?

Well, the answer is pretty straightforward – as often as you need to!

Your artist bio is an important tool for introducing yourself to potential buyers, galleries, and employers, so it should be kept up to date as your career progresses.

Revisiting your biography every year is a great way to ensure it still accurately represents your current work and achievements. As you continue to create new pieces and gain recognition, you’ll want to make sure your biography is showcasing your latest and greatest.

It’s easy to fall into the trap of using an outdated biography. You may have created a biography early on in your career, and it may not be relevant anymore. That’s okay! Take some time to review and update it, and make sure it reflects your current work and accomplishments.


Your artist bio is a BIG deal.

And the good news is that once you have it ready, you feel a BIG relief.

It’s what can set you apart from the rest and help you connect with your audience. So, when you sit down to write it, take your time and put in the effort to craft something that really reflects who you are as an artist.

Your bio can add that extra layer of interest and intrigue to your art, so make it count!

Want one on one help with your bio? If you would like to have word-by-word artist bio templates, your own bio revised and edited by a professional art writer, then consider applying to our flagship program – the Professional Artist Accelerator.

Read More
Sell Art Online

How to Ship Your Artwork

Mailing artwork is an intricate and sometimes complicated process, so it is very important to do your research and consider essential factors that might affect shipping. The most important thing is to make sure that the piece arrives at its destination in the same condition it was in before leaving the studio.

Factors to consider when mailing artwork

Here are the key factors to consider when mailing artwork:

  • Size and Weight – How heavy an artwork is will be a determining factor of how it must be shipped. Bigger artworks will require bigger custom crates and will probably be shipped via freight, while smaller pieces can be shipped in a box.
  • Insurance – Purchase insurance to protect the piece from loss or damage. When choosing insurance, think about the value of the artwork and choose the most appropriate one from the list.
  • Fragility – You must also consider the materials used for the artwork before shipping it. For example, a painting on canvas or wood is more durable than, say, a piece made of glass.
  • Climate and Weather Conditions – Sunlight, rain, and extreme weather conditions may affect the quality of the artwork upon shipment. So it is important to select a shipping method that can protect the piece from these conditions.
  • Customs Regulations – If you are doing international shipping, you need to educate yourself about the rules and regulations of different countries regarding export/import. Once done, evaluate, make a list, and only cater to the countries where you can ship successfully.
  • Shipping details – Lastly, before shipping the artwork, you must make sure that all the labels on the package are correct. All necessary information must be there. If there are specific handling instructions, communicate those to the courier and include them in your label as well.

Packing and Preparing your artwork for shipment

Now that you have considered the important factors before shipping your artwork, it’s time to prepare and pack the precious piece for shipment. It is very important that your materials for shipping are accurate and complete before packing the artwork, as this ensures that the package is safe for transit.

Here is the simple step-by-step process you can follow:

  • Step 1: Gather your materials – You may want to segregate a list of items solely dedicated to packing the artwork. This may include a pair of scissors, gloves, measuring tape or ruler, acid-free tissue papers, bubble wrap, packing tape, foam boards, shipping boxes, cardboard corners, etc.
  • Step 2: Sanitize the artwork – This part is crucial because you cannot just use any cleaning supplies or materials to sanitize the artwork. As the creator, you know the materials used in the artwork and which cleaning solution will work best. You may use a lint-free cloth to very carefully clean the piece and remove dust or debris.
  • Step 3: Use acid-free tissue paper – Acid-free tissue papers are ph neutral, so they are versatile and lightweight and do not yellow or break over time. Protect and cover the artwork with several layers of acid-free tissue paper to protect it from scratches.
  • Step 4: Use protective wrapping – You want to protect the artwork by wrapping it with multiple layers of bubble wrap and then securing it with tape.
  • Step 5: Sandwich the artwork using cardboard or foam board – To protect the artwork even further, connect two pieces of cardboard or foam board together like a sandwich and place the artwork in the middle.
  • Step 6: Place the artwork in a shipping box or crate – Opt for sturdy shipping boxes that are larger than the piece you will pack. Place the artwork inside the box—there will be empty spaces or gaps for sure. You can fill these spaces with crumpled papers, bubble wrap, or paper/air cushions to prevent the artwork from moving during transit.
  • Step 7: Put the label on the box – This is an important step where you want to make sure that complete information is indicated. Include the recipient’s address, return address, and any other specific instructions for handling the package.
  • Step 8: Consider getting insurance for the artwork – Insurance is your coverage against the unexpected. You may insure it for its full value so you have protection against loss or damage.
  • Step 9: Ship the artwork – The last step is, of course, to ship the artwork. Educate yourself and choose a respectable courier that specializes in shipping artwork. You also want to get the tracking details and track the shipment until it arrives at the destination.

How to choose a courier for your artwork

The courier’s performance will affect not only you but your buyer, so it is essential to pick a courier that could make your and your customer’s experience worthwhile.

When choosing a courier for art, there are important factors to think about and consider to make sure that your artwork is safely transported and that you have peace of mind.

When conducting your research, here are some tips on how to select a suitable courier for your art:

  • Check the courier’s experience and expertise in handling and shipping artwork. You may want to find out if they are experts in shipping fragile and valuable pieces.
  • Find out if the courier offers custom or specialized services for artwork, such as insurance coverage, types of vehicles, and temperature-controlled vehicle.
  • You also want to research the courier’s reputation via online reviews. The feedback you should be looking for is about handling artwork or fragile items. Also, it is a plus if they have experience handling packages for galleries, exhibits, artist clients or any art-related events.
  • Choose a courier that has a reputation for being responsive and easy to communicate with. It will surely be a hassle on your end if the courier is unresponsive or has poor communication strategies.
  • Look at their website and see the tracking system. You want a courier with a system that is easy to follow and understand. As the seller, you want to track the item until it reaches its destination, so it is important that you have visibility on tracking and monitoring updates.
  • Compare fees between couriers. Select the one that is within your budget but still offers the best value for money. Consider additional fees for customized services, insurance, etc.
  • If you are going to ship internationally, choose a courier that has experience with exporting goods, has knowledge about customs regulations, and knows their way with international policies regarding the shipment of artwork.

How to pack a painting

As a bonus, we will also give you some tips on how to ship a painting. The process is similar to how you ship any other type of artwork, but it requires more attention and care.

Packing Unframed Paintings

One way you can easily pack unframed paintings is in a tube.

  • Step 1: Prepare your materials. Gather a sturdy tube that is larger than the size of the painting, acid-free paper, packing tape, and labeller.
  • Step 2: Wrap the painting. Very carefully roll the painting with the painted side facing inwards, then use your acid-free paper to protect the exterior of the painting.
  • Step 3: Slide your painting into the tube while making sure it is centered and has enough space on the tube to add some extra padding.
  • Step 4: Add fillers to the sides of the tube to ensure that the painting does not move during transit. You may use crumpled paper, air cushions, or any other fillers that will not bleed into the painting.
  • Step 5: Seal the tube properly, then add a label that says the package is fragile and must be handled with care.

Packing Framed Paintings

Packing and shipping framed paintings require more time and concentration than when you’re packing unframed pieces. Here are simple steps on how it’s usually done:

  • Step 1: Prepare your workspace and gather the materials you will need. Some of the basic items you will use are gloves, pair of scissors or cutter, measuring tape, packing and clear tape.
  • Step 2: Since you will be handling a fragile material, make sure that there are no loose sharp materials nearby that can damage the artwork. Remove any accessories you have on your hand as an extra precautionary measure.
  • Step 3: Double-check the condition of the artwork and take pictures of it so you have proof it was packed in good condition. You will also need to get the measurements of the artwork to measure it against the box where it will be shipped in.
  • Step 4: Wrap the paintings using acid-free paper. For paintings with acrylic glazing, you will need to use acid-free paper to cover the front. If you are packing a painting with glass glazing, put glass tape on the glass first before covering it with acid-free wrapping.
  • Step 5: For additional protection, you may cover the artwork with bubble wrap and then put cardboard corners.
  • Step 6: Place the painting in a box or crate and make sure it is placed securely. Any gaps in the box should be filled with air cushions, etc., to ensure safe transport.
  • Step 7: Lastly, seal the box and label it with “fragile” and “handle with care”.

We know how worrying it is to ship something very valuable, so we hope this article helps you. There are indeed a lot of ways you can do to make sure you are able to ship your artwork securely. Remember to take your time to do your research to ensure you pack your artwork properly and you pick the right courier for your art business.

Read More
Gallery Representation

How to Write an Artist Statement (for Fine Artists)

Your artist statement is a fundamental piece of writing in your art career, so it is important to invest a good focused time on producing your artist statement.

You may draft an artist statement for each meaningful artwork you produce,
or you can have an artist statement that represents the underlying theme for all of your work.

It is typically used in exhibitions, your artist website, grant applications, art fair display, galleries, press releases, fellowships, and many more.

Additionally, it can serve as a marketing tool for galleries, collectors, and other stakeholders to get in touch with you.

What is an Artist Statement?

Your artist statement is a concise description of your work that bridges your audience to your art. It explains your creative process, motivations, influences, inspirations, medium, and technique.

The purpose of your artist statement is to help viewers and potential buyers (your audience) understand and appreciate your artwork on a deeper level.

👀 After reading your artist statement, the goal is for your audience to begin looking at your artwork with fresh eyes, as your artist statement gave them a new appreciation and understanding of the inspirations and meaning behind your art pieces.

Who is your “audience”?

To put it simply, your audience is anyone who might be a potential buyer of your artwork.

But if you have a target audience in mind, it’s important that you tailor your artist statement in such a way that your audience can relate to and easily understand it.

Some potential audiences for an artist statement may include:

✔️ Art Critics, Curators, and Historians

These individuals look at the artist statement to gain more context when writing or analyzing an artist’s work.

They may refer to the artist statement to understand the creative process and the underlying philosophy behind the pieces.

✔️ Gallery Owners and Art Dealers

These people refer to the artist statement to determine the suitability of the pieces for the gallery. They may need the statement to effectively promote and market the pieces.

✔️ Peers and Fellow Artists

Your artist statement can also open up important collaborations with different artists.

Fellow artists may refer to your artist statement to determine your artistic approach and creative process, which will then be the groundwork for all artistic discussions and critique sessions.

✔️ General Public

We all know that art can connect to people beyond words can explain…

Therefore, even people outside the artistic community can be potential buyers.

Your artist statement can serve as a window to your personal creative world where people can foster a deeper connection to your work.

Artist Statement vs. Artist Bio

ARTIST STATEMENTARTIST BIO
✔️ Provides insight into an artist’s medium and creative process, influences and inspirations, and conceptual framework and philosophy

✔️ Helps potential buyers understand and appreciate the artwork on a deeper level

✔️ Explains the artist’s artistic vision, philosophy, and the concepts they explore in their work. It may also discuss the artist’s techniques, materials, and methods of working, as well as their goals and intentions for their art

✔️An artist statement is usually written in the first person, reflecting the artist’s unique voice and perspective
✔️ Provides a summary of an artist’s background, achievements, and career highlights

✔️ Often used for promotional purposes and aims to provide an overview of the artist’s professional background and credentials

✔️It may include information such as the artist’s education, training, exhibitions, awards, collections, and other relevant professional experiences

✔️ An artist bio is typically written in the third person

How to write an artist statement

Do not expect that your artist statement will be ready from the get-go.

It will take some time for you to produce that artist statement that really speaks to your audience. It might take multiple revisions and fine-tuning to have a finished, concise, and compelling written product.

When writing your Artist Statement, remember these steps:

✔️Get to the point

Brevity is the key. Form simple sentences in order for the readers to retain the information better.

✔️ Write then rewrite

Rarely will you produce a written output that is good to go on the first draft.

Be kind to yourself and expect that the 1st draft is not going to be very good and polished.

By allowing yourself to write and rewrite, you will be able to eventually produce a piece that is inspired and in tip-top shape.

✔️ Avoid passive voice

Using passive voice makes the sentence weaker and makes it harder to retain the main point of the sentence. On the other hand, sentences using the active voice are easier to follow and digest.

Active voice: The subject of the sentence is performing the action.

For example, I painted the masterpieces you saw in the gallery.

Passive voice: The action is received by the subject. In these sentences, the focus is on the action itself and not on the doer of the action. And this is why these draw the attention away from the author.

For example, The masterpieces you saw in the gallery were painted by me.

✔️ Provide Context and Reference other artists only when necessary.

It is OK to mention the inspiration behind your work, but remember to draw attention back to your work. Create images for the reader, even if they are unfamiliar with the referenced artist.

Mention the work of that artist that inspired yours: explain the ideas, themes, creative process, materials used, and concepts that spoke to you and how those contributed to the foundation of your artwork.

✔️ Write in the first person and use your unique voice.

Use your own voice when writing the artist statement to make the tone more genuine and sincere. Dig deeper, and do not be afraid to show your personality.

After all, your unique self, experiences, and influences are what made the artwork whole.

Aim for clear, concise, and engaging language that reflects your unique artistic perspective.

✔️ Avoid artspeak—do not alienate your audience.

An effective artist statement conveys the message successfully not only to the members of the art community but to the general public as well. In order to sound more relatable, you want to use language and terminologies that are easy to understand.

Avoid the use of jargon that only art enthusiasts would know.

Structure

Like any other piece of writing, the flow of ideas plays an important role in being able to retain important information. Here is where effective storytelling with solid structure comes into play.

Your artist statement should have a beginning, middle, and end.

✔️ Start from the beginning

Just like when you’re telling a story, you want to start from what happened first. Begin with a clear and concise introduction that catches the reader’s attention and gives an overview of your artistic journey/practice.

✔️ Talk about your medium

Ask yourself:

  • How did I make this?
  • What was my process? Was it trial and error?
  • What is the concept behind my work?
  • What are my artistic style/techniques, themes, and influences?

✔️ Talk about your motivations and inspirations

This is where you can reference other artists’ work. Ask yourself:

  • How has their work inspired me?
  • What concepts spoke to me, and how do I apply those to my own practice and artworks?
  • What is the main underlying philosophy behind all of my work? What is my main message?

Remember that your job is not to convince or debate. You only need to communicate and let your art do all of the talking.

✔️ End it with a short summary of your artistic practice

Think about the one thing you want your readers to retain. You can also invite readers to connect with your work through your contact information.

How to begin writing the artist statement

Treat writing your artist statement as a thoughtful and introspective process where you can really know more about yourself and your art.

Here are some recommendations for how to begin writing it:

✔️ Ask a close friend to interview you

If you are not a fan of writing, sometimes it can be difficult to find the right words to describe what you really want to say. Good news, you may find exactly what you want to say by actually saying it.

We recommend supplying a friend with questions you want to include in your art statement and recording your answers. Then, listen to it and take down the sincere, honest, and genuine answers you want to include in your artist statement.

✔️ Reflect on your work

It is a good practice to spend some time reflecting on your work and thinking about the creative process and inspirations behind each one of them. Also, reflect on the uniqueness of each artwork and the message you want to communicate to your audience.

✔️ Think about your roots

Your culture and heritage can also be the main influencers of your work. Take some time to think about how your upbringing and culture inspired your art, then ask yourself if you want to include this piece in your art statement.

✔️ Mull over some social issues and your political stance

If you are an artist who draws inspiration from certain social and political causes, you may want to think about the main cause that inspires most of your artwork.

But again, remember that the goal of your artist statement is not to change people’s perspectives and fight with them in doing so but to communicate your passions and inspirations, hoping that the artwork itself speaks to the audience.

✔️ Spend some time in nature

A lot of artists draw inspiration from nature, and being in nature sometimes gives you new perspectives and clarity. You want to be in a peaceful state in order to put your thoughts on paper.

Truly, writing the artist statement can be intimidating at first. But remember that in the process of writing it, you’ll surely discover more about yourself and your art.

Read More
Art

Is Art School Worth It?

Maybe you are at a crossroads right now… deciding whether to enroll in an Art School or not. We know this could be one of the most important decisions you need to make that can change the trajectory of your art career.

But no worries, in this article, we will list the benefits and drawbacks, share some pointers about what might help your decision, and outline what to look for in an art school.

Let’s begin with the benefits.

What are the benefits of going to Art School?

Art Schools can be beneficial to both new and experienced artists.

For emerging artists, going to art school can open up many career opportunities. Attending one can also help you realize your artistic style and philosophy.

As an experienced artist, you probably have established your style and art practice already. It could be that you have already identified the one thing you want your audience to catch from your artwork. But attending art school can still widen your artistic world and make way for dimensions you have not yet explored.

Here are some potential benefits of attending art school:

✔️ Skill Enhancement and Continuing Education

Art Schools often have courses that can expose you to various artistic techniques that can further enhance your technical knowledge. You will be introduced to various concepts that may be helpful to the advancement of your art career.

Your learning should never stop, so even if you have many years of experience as an artist, several accomplishments under your belt, and know exactly what you want to achieve, staying up to date with the latest art trends can help you stay relevant in this ever-changing art world.

✔️ Networking and Critiques

Art schools are such an incredible place to connect with fellow artists and network with art experts, alumni, and faculties, which can surely expand your circle of influence. You can get inspiration from the whole community of artists learning together while being exposed to unique approaches to art.

These connections lead to collaborations and exhibits that can advance your career.

Art school is also a place where you can be exposed to different perspectives that can challenge your techniques and push you beyond your artistic limitations in order to grow as an artist.

✔️ Access to Studio Spaces, Resources, and Facilities

Attending art schools can give you access to materials, resources, and equipment that may not be readily available in your usual normal place of work. You will be able to enhance your style and practice your craft while experimenting with different techniques using the resources available in an art school.

✔️ Mentorship

Art school is a place where you can get expert advice. The faculty members and teachers can offer you guidance as you realize and go through your artistic journey. These people will willingly share insights and words of wisdom based on their own experiences as artists, which leads to new perspectives you can use to look at your own art as well.

✔️ Portfolio Development and Exposure to Exhibitions

Art schools also organize student exhibitions where students can grow their art portfolio and give them exposure.

If you want to sell art and be a professional artist, this is an extremely helpful experience since you are looking to be featured in galleries or museums in the future.

✔️ Artistic Development and Inspiration

Being in art school can foster your personal development as an artist. During your time attending, you will be able to realize your passions, identify your medium, be exposed to different perspectives and techniques, and grow your artistic abilities.

You will be constantly inspired by the diverse art community that supports and learns from each other.

What are the drawbacks of enrolling in an Art School?

We have previously established the many benefits of joining an art school. But like in many investments (yes, attending an art school is an investment!), there are also potential disadvantages in joining one:

✔️ Cost and Expenses

Art School tuition fee is not cheap and requires huge funds. If students do not have the budget for it, they typically go for student loans and debts, but this is crucial and can impact their career afterwards.

✔️ Time and Dedication

Another important investment you will need to be committed to giving is your precious time. Mastering and learning about something will not take overnight. It requires patience and time commitment.

If you already have an art career before enrolling, then that would mean you need to be less active in your professional practice for a while to be dedicated to art school.

✔️ Personal Autonomy and Flexibility

If you are an artist that is used to managing your own time, then attending art school may be challenging for you as you need to adhere to school prerequisites. Like normal schools, art schools may have specific requirements, assignments, and projects that can limit your creative freedom and personal autonomy.

Before you decide to enroll in an Art School

Joining an art school is a major decision that could impact you and your art career, so it is always recommended to think it through again and again.

Here in this section, we have listed down some things that can help you in your decision-making:

✔️ Identify your vision

It is difficult to navigate your art journey if you do not have a clear vision of what you want to achieve. Once a clear vision is identified, think about how essential it is to attend an art school to achieve your goal. If an art school education is necessary for you to achieve your goal, then you may consider it.

✔️ Have a budget

As mentioned in the previous section, art school can be expensive. You want to make sure that before deciding to pursue this path, you are financially ready.

If you are not prepared and do not have the funds for it, you are looking at thousands of dollars in student loans that you may need to repay after you graduate.

✔️ Be ready to critique and be critiqued

Providing, receiving, and implementing feedback are important skills you need to possess and demonstrate in art school. You must first learn not to take critique personally, as it is as important and as basic as learning every skill in art school.

Your work and style will be criticized for sure, but you must keep an open mind and remember that this would help improve your art and prepare you for the challenging world of art business.

What to Look for in an Art School

Truly, there are many great art schools out there, but in looking for that one particular school you want to join, you might want to consider and research more about the following important factors:

✔️ Location

Perhaps you want a school that is near your workplace or even home. If this applies to you, then maybe you may want to look for schools that are in proximity to your home or studio. It should be easily accessible if you plan to commute, especially if you do not have a private vehicle.

Also, some students tend to consider the environment of the school. Some people want to see nature, and some want to be enclosed in a building where they can think by themselves and spend some time pondering their inspirations. If you identify yourself in any of the two, then think about where the school is situated.

✔️ Facilities

You want to also research the facilities of the art school. If the art you’re making requires some specific facility and materials, find out if the school can cater to your needs. The facilities also give you an idea if it’s conducive for learning, so it should give off the “vibe” that you think you can be comfortable staying and learning.

✔️ Faculties and Graduates

As for the faculties, you may research who will be the teachers and mentors and their specialization. Also, find out the teacher-to-student ratio and ask yourself if you can work on that approach or teaching style. Some people require a larger class, and some can learn better in small classes.

The graduates can be a determiner of the success rate of the school. If there are successful, well-known, and thriving artists that became the product of that school, then you can add that school to your list.

✔️ Safety and Security

Look for a school that is considered safe and conducive to learning. Find out about the accessibility to emergency services, crime rate percentage, and even the traffic situation.

These are all very basic but can definitely impact your day-to-day situation in school, so it is important that you consider the small things and you are careful and prepared.

There are many things to consider in attending an art school, but at the end of the day, the questions “Is it worth it?” and “Should I go for it?” can only be addressed by YOU.

Read More